



1. Open your VPN app and hit the big Disconnect button.
2. Go to your device Settings > VPN and flip the master switch to Off.
3. Delete the app and remove the VPN Configuration Profile in your system settings.
You’d think turning off a VPN would be a simple, one-click affair. But if that were true, you wouldn't be here. In reality, hitting the OFF button is often just a suggestion, one that your device might ignore five minutes later when it mysteriously toggles itself back on, or when your browser stubbornly continues to show a German IP address.
Before you flip the switch, however, remember that disabling your VPN instantly strips away your digital camouflage. The second the tunnel collapses, your real IP address and DNS queries are served up to your ISP or whoever is running the local network. While toggling it off on your encrypted home Wi-Fi is usually a non-event, doing so on a public hotspot is a genuine risk that leaves your device visible to every other guest on the network.
Your goal should always be to get back behind the curtain the moment you’ve finished the task that forced you to disconnect. To help you do that safely, this guide breaks down how to properly turn the VPN off on any device you own.
How to Disable a VPN on Any Device: Step-by-Step Instructions
If you’ve ever tried to turn off a VPN only to have it zombie back to life three minutes later, it’s likely because you killed the app but left the system-level rules intact. To truly go off-grid, you need to know exactly where your device hides its master override.
Mobile Devices
iPhone & iPad (iOS 16, 17, 18, 26)
Apple finally realized that burying VPN settings five menus deep was a nightmare. In recent versions of iOS, they moved the toggle to the front page, but the old path still haunts users on legacy devices.
- Method 1: Open your VPN app (e.g., Windscribe) and tap the big Power/Disconnect button.
- Method 2 (for iOS 16+): Open Settings and look right below Personal Hotspot. You’ll see a VPN toggle. Flip it to OFF.
- Method 3 (for iOS 15 and earlier): Go to Settings → General → VPN & Device Management → VPN. Toggle the Status to Not Connected.
If your VPN keeps turning itself back on, go to the VPN menu in Settings, tap the (i) icon next to your active profile, and toggle OFF "Connect On Demand." This kills the zombie reconnection feature.
Android (generic)
Android is a fragmented world, but most devices follow a logical flow. The key here is disabling the kill switch features that block your internet when the VPN is off.
- Method 1: Open the app and hit Disconnect.
- Method 2: Go to Settings → Network & Internet → VPN. Tap the Gear Icon next to your VPN provider and select Disconnect.
To stop the VPN from re-connecting, go to the Gear Icon menu and make sure that both "Always-on VPN" and "Block connections without VPN" options are toggled OFF. If these are on, your phone will refuse to load a single byte of data until you reconnect.
Because every manufacturer likes to move the furniture around, here is exactly where to find the VPN menu on different Android devices:
| Brand / OS | The Navigation Path |
|---|---|
| Samsung (One UI) | Settings → Connections → More connection settings → VPN |
| Google Pixel | Settings → Network & internet → VPN |
| Xiaomi (HyperOS/MIUI) | Settings → Connection & sharing → VPN |
| OnePlus (OxygenOS) | Settings → Wi-Fi & network → VPN |
| Huawei (EMUI) | Settings → More connections → VPN |
| OPPO/Realme | Settings → Connection & sharing → VPN |
Desktop Computers
Windows 11
On Windows 11, the Quick Settings panel is now the fastest way to kill a connection, but the deeper settings menu is where you go to stop a VPN from zombie-ing back to life.
- Method 1: Open your VPN client (like Windscribe) and click the big Power or Disconnect button.
- Method 2: Click the Network icon (the Wi-Fi or Globe icon) in the bottom-right taskbar. Click the VPN tile, select your connection, and hit Disconnect.
- Method 3: Go to Settings → Network & Internet → VPN. Find your active provider and click Disconnect.
- Method 4: To remove the app completely, go to the VPN settings, click the arrow next to the connection, and select Remove.
To stop the app from reconnecting, go to the Settings → Network & Internet → VPN menu and click the arrow next to your connection name. Ensure "Allow VPN over metered networks" and "Allow VPN while roaming" are toggled OFF.
Windows 10
On Windows 10, you’ll often find yourself bouncing between the modern Settings app and the old-school Control Panel.
- Method 1: Open the app and click Disconnect.
- Method 2: Go to Settings → Network & Internet → VPN. Click on your connection name to reveal the hidden buttons, then select Disconnect.
- Method 3: If a ghost connection won't die, go to Control Panel → Network and Sharing Center → Change adapter settings. Right-click the VPN adapter (it will usually be labeled TAP or WireGuard) and select Disable.
- Method 4: To remove the VPN app entirely, go to the Settings > VPN menu, click the connection, and hit Remove.
macOS (Sonoma, Sequoia, Tahoe, and newer)
- Method 1: Click the VPN icon (a small slider or shield) in the top-right menu bar and toggle the connection to Off.
- Method 2: Click the Apple Menu → System Settings → VPN in the sidebar. Toggle the master switch next to your VPN provider to Off.
- Method 3 (for macOS Monterey & earlier): Go to System Preferences → Network. Select your VPN from the left sidebar and click Disconnect.
- Method 4: To remove the VPN app completely, go to the VPN settings menu, click the (i) icon next to the profile, and select Remove Configuration.
Linux
Linux users expect a choice between a GUI button and a terminal command. Here is how to handle both.
The GUI Method (GNOME/KDE):
- Click the Network icon in your top panel
- Select VPN Off or click the active connection
- Choose Disconnect
The Command Line (CLI) Method:
- NetworkManager: nmcli connection down [vpn-name]
- OpenVPN: sudo systemctl stop openvpn@[config-name]
- WireGuard: sudo wg-quick down [interface-name] (e.g., wg0)
- Windscribe Users: windscribe disconnect
Chromebook (ChromeOS)
Chromebooks are unique because they often run three types of VPNs: a Chrome extension, an Android app, and a system-level profile.
- Method 1: Click the Time in the bottom-right corner → Settings (Gear icon) → Network. Under the VPN section, toggle the active connection to Off.
- Method 2: If you installed your VPN from the Play Store, open the app and follow the Android Mobile steps above.
- Method 3: Click the Puzzle Piece icon in Chrome, select your VPN extension, and hit Stop or Disconnect.
To stop the VPN from reconnecting on your Chromebook, go to Settings > Network, click the arrow next to your VPN, and ensure "Automatically connect to this network" is untoggled.
Smart TVs & Streaming Devices
Unlike phones or computers, Smart TVs don't always give you a master switch for a VPN. Depending on your TV's brand, your VPN is either an app you can close or a router-level setting you have to hunt down.
Apple TV (tvOS 17 and newer)
Until 2023, you couldn't run a VPN on an Apple TV without technical gymnastics. Since tvOS 17, native VPN apps are now supported, but they can still be a bit sticky once turned on.
- Method 1: Open your VPN app on the Apple TV and select Disconnect.
- Method 2: Go to Settings → General → VPN & Device Management. Select the active VPN profile and choose Disconnect or Delete VPN.
Fire TV Stick / Fire TV
Fire OS is essentially a modified version of Android, so it handles VPNs similarly. However, background apps on Fire TV Sticks are famous for staying alive to avoid being killed by the system.
- Method 1: Find your VPN in the Home Row or under Apps → Your Apps & Channels. Open it and hit Disconnect.
- Method 2: If the VPN won't die, go to Settings → Applications → Manage Installed Applications. Find the VPN app, select Force Stop, or choose Uninstall to remove it for good.
Android TV / Google TV (Sony, Hisense, Nvidia Shield, Chromecast)
Because these devices run a version of Android, they are the most VPN-friendly TVs, but the settings menus can vary wildly by brand.
- Method 1: Open the VPN app from your apps row and hit Disconnect.
- Method 2: Go to Settings → Network & Internet. On some builds (like the Nvidia Shield), you’ll see a VPN section where you can toggle the connection off directly.
Samsung (Tizen), LG (webOS), & Roku
These devices do not support native VPN apps. If you’re seeing a different location on your Samsung or LG TV, or if your Roku is VPN-protected, it’s happening in one of two ways:
- Router Level: The VPN is installed on your Wi-Fi router.
- Smart DNS: You manually changed the DNS settings in the TV's network menu.
To disable the VPN, go to Settings → Network → Expert Settings (on Samsung) or Advanced Wi-Fi Settings (on LG). Ensure DNS Settings are set to "Get Automatically."
Gaming Consoles
Sony, Microsoft, and Nintendo don't allow native VPN apps in their official stores. If your console is showing a foreign IP address, the off switch is actually on the device providing your internet.
PlayStation & Xbox (PS5, PS4, Series X|S, One)
Because these consoles don’t allow for VPN apps, you’re likely using one of two common workarounds. Find your scenario below to kill the connection.
Scenario A: The VPN is on your router.
If every device in your house thinks it’s in Tokyo, the VPN is running on your hardware. You must log into your router’s admin panel (usually 192.168.1.1) and toggle the VPN client to Off.
Scenario B: You’re sharing a connection from a PC.
If your console is tethered to your PC via Ethernet or a mobile hotspot to bypass school or work blocks, the VPN is running on that computer. Simply disconnect the VPN app on your PC. To be safe, go to your PC’s Network Settings → Mobile Hotspot and toggle it off.
Scenario C: You’re using Smart DNS.
This is common for unblocking Netflix or Hulu without the lag of a full VPN. It doesn't encrypt traffic, but it does spoof your location. On your console, go to Settings → Network → Set Up Internet Connection. Select your active connection, choose Advanced Settings, and change DNS Settings from "Manual" back to "Automatic."
Steam Deck
The Steam Deck is unique because it’s a portable Linux PC. How you disable the VPN depends on which mode you are currently using.
- Method 1: If you use Decky Loader with a plugin like TunnelDeck, press the "..." button on the right side of the Deck. Scroll down to the Decky icon, select TunnelDeck, and toggle your connection to Disconnect.
- Method 2: If you set up a standard Linux VPN, you must switch to Desktop Mode (Power → Switch to Desktop). Click the Network icon in the bottom-right taskbar, find your VPN connection, and click Disconnect.
Nintendo Switch
The Switch is the most limited console on this list. It doesn't support VPN apps or even basic internet sharing easily. If your Switch is on a VPN, it’s getting that signal from your Router or a PC Hotspot. There is no off toggle in the Switch menus. Follow the instructions for "Scenario A" or "Scenario B" above to stop the VPN at its source.
Wi-Fi Routers
To disable a router VPN, you need to access your router’s Admin Panel via a web browser. Most routers live at 192.168.1.1 or 192.168.0.1.
ASUS (ASUSWRT & Merlin)
ASUS routers have one of the most robust VPN clients, but the settings are buried under the "Advanced" sidebar.
- The Path: Log in → VPN (left sidebar) → VPN Client tab.
- To Disable: Find your active profile in the "VPN Server List" and click the Deactivate button.
TP-Link (Deco & Archer)
TP-Link handles VPNs differently depending on whether you’re using their Mesh system (Deco) or a standard router (Archer).
- Deco (App Method): Open the Deco app → More → VPN → VPN Client. Toggle the master switch to OFF.
- Archer (Web Method): Log in → Advanced → VPN Client. Toggle the Enable switch to OFF.
GL.iNet (Travel Routers)
GL.iNet routers are built for VPN users, which makes them easy to toggle but also easy to accidentally lock into a non-working state.
- The Path: Log in → VPN → VPN Dashboard.
- To Disable: Click the Disconnect button next to the active OpenVPN or WireGuard client.
Netgear (Nighthawk)
Most stock Netgear routers only support a VPN Server (for accessing your home from away), not a VPN Client (for privacy).
- To Disable: Log in → Advanced → Advanced Setup → VPN Service. Uncheck "Enable VPN Service" and click Apply.
- If you use a Client: If you’re using a VPN to hide your IP on a Netgear, you are likely using DD-WRT or a FlashRouter. Follow the "Custom Firmware" steps below.
Custom Firmware (DD-WRT & Tomato)
If you’re running custom firmware, you’re in power-user territory.
- DD-WRT: Go to Services → VPN. Find the OpenVPN Client section and select Disable. Click Save and then Apply Settings.
- Tomato: Go to VPN Tunneling → OpenVPN Client. Click the Stop Now button and then Save.
Disabling a Manually-Configured VPN (No App)
If your VPN was set up by an IT department or you manually entered IKEv2 or L2TP server details, it lives in your system settings. Even if you delete every app on your device, these manual profiles stay active until you forget them.
iOS Manual VPN (IKEv2, L2TP, IPsec)
Manual VPNs on iPhone are usually installed via a Configuration Profile.
- To disconnect: Go to Settings → VPN (right under Personal Hotspot) and flip the switch to Not Connected.
- To remove permanently: Go to Settings → General → VPN & Device Management. Tap the profile name, then tap the (i) icon or the profile itself and select Remove Profile or Delete VPN.
If you're turning the VPN off because Safari already feels covered, that's usually Private Relay doing the work. Is Apple Private Relay a VPN is worth reading before you rely on it alone.
macOS Manual VPN
On newer Mac versions, manual VPNs are tucked into the unified System Settings sidebar.
- To Disconnect: Click the Apple Menu → System Settings → VPN. Toggle the specific connection to Off.
- To Remove Permanently: Click the (i) or the "Details..." button next to the VPN name. Click Remove Configuration at the bottom of the pop-up and confirm.
Windows 11 & 10 Manual VPN
Windows treats manual VPNs as Network Connections. They don't appear in your Add/Remove Programs list.
- To disconnect: Go to Settings → Network & Internet → VPN. Select the connection and hit Disconnect.
- To remove permanently: On the same screen, click the connection name to expand it, then click Remove.
- The quick way: Press Windows Key + A to open Quick Settings, click the VPN tile, and disconnect from there.
Android Manual VPN
Android hides manual VPNs behind the Network menu. If you see a key icon in your status bar but no VPN app in your drawer, this is where it’s hiding.
- To disconnect: Go to Settings → Network & Internet → VPN. Tap the active connection and choose Disconnect.
- To remove permanently: Tap the Gear Icon next to the VPN name and select Forget (or the trash can icon). This wipes the server info and credentials from your phone entirely.
Disabling a Browser-Based VPN (Extension)
A browser VPN extension only encrypts the traffic inside that specific browser. If you disable your Chrome VPN but leave your desktop VPN app running, your IP remains hidden. Conversely, if you disable your desktop app but forget about the extension, your browser is still tunneled. You have to check both.
Chrome, Brave & Vivaldi
Since these browsers share the same foundation, the management process is identical.
- Method 1: Click the Puzzle Piece icon (Extensions) in the top-right. Click the VPN extension to open its mini-dashboard and hit Disconnect.
- Method 2: Type chrome://extensions into your address bar (or brave://extensions / vivaldi://extensions). Find the VPN card and toggle the switch to OFF.
Firefox
Firefox manages extensions in a dedicated Manager tab rather than a sidebar.
- Method 1: Click the Extensions icon (looks like a puzzle piece) in the top-right. Click the VPN and hit the Power button.
- Method 2: Click the Three Lines (Menu) → Add-ons and themes → Extensions. Locate your VPN and toggle the blue switch to OFF.
Microsoft Edge
Edge handles extensions similarly to Chrome but hides them behind its own menu structure.
- Method 1: Click the Extensions icon (puzzle piece) in the top-right toolbar. Select your VPN and hit Disconnect.
- Method 2: Click the Three Dots (...) → Extensions → Manage extensions. Toggle the switch next to the VPN to OFF.
Safari (macOS)
Safari is the outlier. It doesn't use a toolbar puzzle piece. Its extensions are managed directly in the system-level app settings.
- Step 1: Go to the Safari Menu → Settings (or Preferences on older versions) → Extensions.
- Step 2: Uncheck the box next to the VPN extension in the left-hand sidebar.
- Step 3: To remove it entirely, you must click Uninstall, which will prompt you to delete the associated app from your Applications folder.
Opera
Opera is unique because it has a built-in VPN that is a core browser feature.
- Method 1: Click the VPN badge to the left of the address bar and toggle it to Off.
- Method 2: If the badge is missing, go to Settings (Alt+P) → Advanced → Privacy & Security. Scroll down to the VPN section and toggle Enable VPN to OFF.
What to Do If Your VPN Won't Turn Off
Sometimes, your VPN can be more stubborn than a mule. If your connection refuses to stay off and keeps zombie-ing back to life even after you’ve hit disconnect, you aren't crazy. Your device is just doing exactly what it was told to do. Here is how to troubleshoot the most common scenarios.

I turned it off, but it turned itself back on
This is the most common VPN behavior. You hit disconnect, but three minutes later, the shield icon is back in your status bar. This is happening because you likely have an Auto-Connect or Always On feature enabled in two different places: the VPN app itself and your device's system settings. When you turn one off, the other sees the dropped connection as a failure and helpfully reconnects you. Worth asking first, though: is it OK to leave a VPN on all of the time? For most people, the answer is yes.
The Disconnect button does nothing
If your Wi-Fi is connected but you can’t load a single page the second you turn off the VPN, you’ve accidentally left the safety gate locked. This means that your kill switch (or Network Lock) is still active.
This feature is designed to block all unencrypted traffic if the VPN drops. If you manually disconnect, but the app still thinks its job is to protect at all costs, it will keep your internet paralyzed until you either reconnect or tell it to stand down.
VPN toggle is grayed out
If you’re staring at a VPN switch that won't budge, or it looks faded and won't respond to your taps, you’re likely locked out by a higher power.
This is almost always due to a Mobile Device Management (MDM) profile. If your phone or laptop was provided by your workplace or school, they have likely pushed a policy enforcement profile that prevents you from disabling the VPN for security reasons.
The Internet is dead after disconnecting
You’ve successfully turned off the VPN, but now your browser won't load a single page, and your Slack is a ghost town.
Your Kill Switch (sometimes called a Firewall or Network Lock) is still active. This feature is designed to block all non-encrypted traffic if the VPN drops. If you disconnect manually, but the app still thinks it's in protection mode, it will keep your internet paralyzed until you tell it to stand down.
VPN icon still shows in the status bar after disconnect
You’ve hit disconnect, the app says you’re off, but that little VPN icon is still mocking you from the top of your screen.
This is often a UI desync, which is a frequent glitch on iOS and some versions of Android. The system hasn't refreshed its status bar yet, or there's a leftover configuration profile that is technically active even if no data is moving.
Can't delete the VPN profile
You’ve found the profile, you’ve hit "Delete," and... nothing. Nada. Or you can’t do anything, because the option to delete the VPN profile is completely missing.
This usually falls into two categories: either an MDM-managed profile or Screen Time restrictions. If it’s a personal device, a parental control or "Content & Privacy" setting might be blocking any changes to your network configuration.
How to Verify Your VPN Is Actually Off
You’ve clicked the buttons, toggled the switches, and sacrificed a goat to the networking gods… but how do you know if it actually worked? Don't just take the app’s word for it. Use these three quick tests to confirm you’re back on the open (and vulnerable) web.
Test 1: Check Your IP Address
Go to Windscribe’s free IP checker and look at the "Your IP Address Location" field. If it says you are where you actually are, then your VPN is off. But if you’re in Toronto, and your IP address says you’re in Frankfurt, then your VPN is still on.
Test 2: Check Your Location on Google
Search engines are incredibly good at knowing where you are (sometimes creepily so). We can use that to our advantage. Just search Google or Bing for "what is my location." If what it tells you matches where you actually are, your VPN has stopped spoofing your location. If Google still thinks you’re abroad, your VPN is still running.
Check for the VPN Indicator
Your device’s status bar is a snitch. If a VPN is active at the system level, the OS is required to show you an indicator.
- iPhone/iPad: Swipe down to open the Control Center. If you see a small VPN badge next to your battery or Wi-Fi icon, you’re still connected.
- Android: Look for a Key icon or a shield in the top notification bar. If it’s there, the Always On feature is likely keeping the session alive.
- Windows: Hover your mouse over the Network icon (the globe or Wi-Fi signal) in the taskbar. If a VPN name appears in the hover-text, it’s still active.
- macOS: Check your top menu bar. If the VPN status icon (the square with bars or a slider) is solid or shows a timer, you aren't disconnected yet.
Alternatives to Disabling Your VPN
Usually, if you want to disable your VPN, it’s because of a specific reason. Maybe your bank is being fussy, Netflix keeps throwing a proxy error, or your internet is just extremely slow. Either way, there’s probably a fix for whatever problem you’re experiencing that makes you want to throw your phone out of the window.
Split Tunneling
If a single finicky app is the culprit, Split Tunneling is your best friend. Instead of stripping off your digital armor entirely, you can route specific apps or websites, like your bank or a local streaming service, outside the encrypted tunnel while the rest of your traffic stays protected.
Network Options
You can also automate your privacy using Network Options. This feature tells Windscribe to stand down on certain networks and connect automatically on others. For instance, you can tell it to keep itself off on your home Wi-Fi but to automatically connect the second you join a public hotspot.
Server Location Change
You don’t need to disable your VPN entirely. Sometimes, the culprit behind a slow connection or an issue with certain apps is your server location. If a site is blocking your current VPN IP or if your connection is painfully slow, switching servers can often fix the issue.
Work, School, and MDM-Managed Devices
If you’re staring at a VPN toggle that is grayed out or the disconnect button simply does about as much as a “Close Door” button in an elevator, you’re likely dealing with a supervised device.
If your employer or school issued your hardware, they aren't about to let you turn off the security features they spent a small fortune to install just so you can browse Reddit in peace.
How to Tell If Your VPN Is MDM-Enforced
A Mobile Device Management (MDM) profile is essentially a set of digital handcuffs that allows a bored IT administrator to control your device's settings from a basement three towns away. You can confirm this is your problem by checking for a few specific red flags.
On an iPhone or iPad, go to Settings → General → VPN & Device Management. If you see a section labeled Mobile Device Management with a company or school name, they own the configuration. On a Mac, look for a Profiles section in your System Settings. On Windows or Android, you may see a message in your settings saying, "Some settings are managed by your organization."
If the VPN toggle is grayed out and you see these labels, your VPN isn't broken. It’s just being held hostage by your boss.
What You Can and Can't Do
The bad news is that if the device belongs to your organization, you generally cannot disable a managed VPN without an IT admin’s blessing. These profiles are designed to be tamper-proof, ensuring that sensitive company data (or school-restricted content) never touches the oh-so-terrifying open web.
However, if this is a personal device you enrolled in a Bring Your Own Device (BYOD) program just to check your email, you usually have the option to unenroll. Just be prepared for the immediate fallout: the second you delete that MDM profile to kill the VPN, you’ll likely lose access to your work inbox, Slack, and internal files faster than a fired intern.
How to Permanently Remove (Uninstall) a VPN
Ideally… don’t! “Yeah, yeah, of course you’d say that, you’re a VPN company!” Yes, but we’re a VPN company that cares more about your privacy than a $3 conversion. Even if you’re using a different VPN and not ours, we’d still tell you to keep it (unless it’s a garbage one, then by all means, delete it and get Windscribe).
But, since you asked, here’s how to permanently (ouch!) uninstall a VPN from your device.
iOS / iPadOS
On an iPhone or an iPad, deleting the app is only half the battle. If you don't kill the profile, the ghost of the VPN may still haunt your network settings.
- The App: Long-press the VPN app on your home screen and select Remove App → Delete App.
- The Profile: Go to Settings → General → VPN & Device Management. Tap on the VPN profile and select Delete VPN. If you see a Management profile from a workplace, you may need to unenroll entirely to get rid of it.
Android
Android is generally good about cleaning up after itself, but Always On rules can sometimes linger in the system guts.
- The App: Go to Settings → Apps → [VPN App] and tap Uninstall.
- The Profile: Go to Settings → Network & Internet → VPN. Tap the gear icon next to any leftover connection and select Forget. This ensures your phone doesn't try to "reconnect" to a server that no longer has an app to talk to.
Windows
Windows likes to keep drivers active even after the software is gone. If your internet feels weird after an uninstall, this is usually why.
- The App: Go to Settings → Apps → Installed apps and uninstall the VPN client.
- The Profile: Go to Settings → Network & Internet → VPN and remove any lingering connections.
- Advanced Cleanup: If things are still glitchy, right-click the Start button and select Device Manager. Look under Network adapters. If you see anything labeled "TAP," "TUN," or "WireGuard Windows," right-click and Uninstall device.
macOS
Mac apps often leave helper tools and launch daemons that stay active even after the app is in the trash.
- The App: Drag the VPN app from your Applications folder to the Trash.
- The Profile: Go to System Settings → VPN (or Network on older versions) and click the (i) next to the configuration to remove it.
- Advanced Cleanup: Check System Settings → General → Login Items. If you see your old VPN in the "Allow in the Background" list, toggle it off. You can also check /Library/LaunchDaemons for any files with the VPN's name and delete them.
Linux
Linux users, you know the drill! It’s all about the package manager and the NetworkManager daemon.
- The Command: Use your specific flavor's command: sudo apt remove [package], sudo dnf remove [package], or sudo pacman -R [package].
- NetworkManager: Use nmcli connection show to find lingering profiles, then nmcli connection delete [vpn-name] to scrub them for good.
The Four "Off" States
You want your VPN off, but… how off do you want it, exactly? While you may think it’s as simple as flipping the ON/OFF toggle, there are actually four different ways of disabling your VPN.
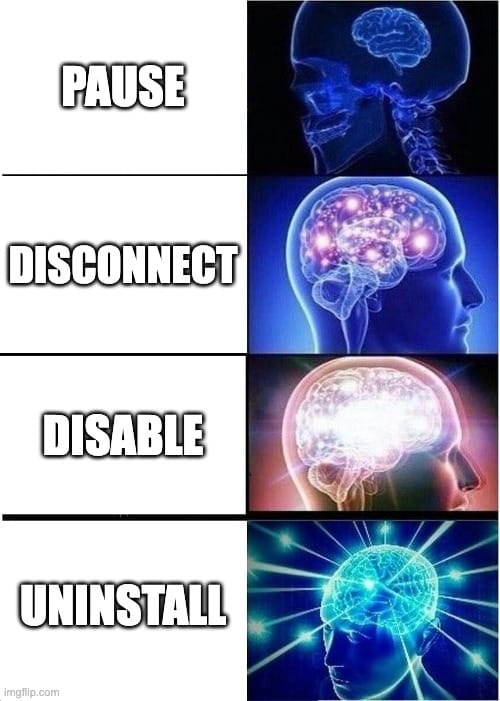
State 1: Pause
A pause is essentially a timed nap for your connection. Many modern apps allow you to disconnect for a set window, like 15 minutes or an hour, after which the tunnel automatically shields back up. This is the best option for quickly bypassing a fussy banking app or a local streaming site, as it eliminates the risk of forgetting to turn your protection back on.
State 2: Disconnect
This is a manual, session-level stop where you simply tap the power button inside the VPN app. Whether it stays off is a "maybe." It typically won't reconnect on its own unless you have features like Auto-Connect or Connect On Demand enabled in the background. Use this for short breaks, troubleshooting your speed, or signing into a hotel’s captive portal Wi-Fi.
State 3: Disable
Disabling is a system-level override. This is where you go into your phone or computer’s internal settings and flip the master VPN toggle off. This state is much stickier than a simple disconnect, but it still requires you to kill any Always On or Connect on Demand rules to ensure the OS doesn't reactivate the profile the moment you lock your screen. This is the best choice for long breaks when you want total manual control.
State 4: Uninstall/Remove
This is the nuclear option: a full removal of the app and every configuration profile it ever touched. To use the VPN again, you would need to go back to the store, reinstall the software, and reconfigure your settings from scratch. This is the path to take if you are switching providers, troubleshooting a completely broken app, or moving off a VPN permanently.
| State | What it does | Reconnects automatically? | When to use it |
|---|---|---|---|
| Pause | A timed nap for your connection (e.g., pausing for 1 hour). | Yes. Once the timer hits zero, the tunnel shields up. | When you need to quickly check a banking app that hates VPNs. |
| Disconnect | A manual session-level stop. You hit off in the app. | Maybe. Depends on whether Auto-Connect or Always On is enabled. | Short breaks, troubleshooting, or signing into a hotel Wi-Fi portal. |
| Disable | A system-level override. You turned off the profile in OS settings. | No. (Provided you also killed the Connect on Demand rules). | Longer breaks or when you don't want the VPN back without your say-so. |
| Uninstall | Total removal of the app and all its configuration profiles. | Never. You'll have to reinstall the app to get back on the grid. | Switching providers or when you're done with a VPN for good (ouch). |
The Keys to the VPN Kingdom Are Yours. Use Them Wisely.
Whether you’re trying to escape a grayed-out work profile or just trying to convince your Smart TV that you aren't where you really are, you now have the keys to the kingdom.
Most of the time, you don’t actually need to kill your protection. You can just take a 15-minute break to breathe, use Split Tunneling so your banking app doesn't treat you like a suspicious stranger, or Network Options so your VPN stands down when you’re safe at home without you having to constantly tweak it.
Turning your VPN off entirely should be your last resort, not your first instinct. The open web is a weird, loud, and occasionally predatory place. Don't stay out there unprotected for longer than you have to.
If you’re looking for a VPN that doesn't feel like a digital straitjacket, try Windscribe for free (yes, for free!). We make it easy to stay protected, and surprisingly simple to turn off when you really, really need to.
Frequently Asked Questions
Is it safe to disable my VPN?
Yeah, it’s generally safe… IF and ONLY IF you’re on trusted networks like your home Wi-Fi, but you'll lose the encryption that hides your activity from your ISP. If you’re on public Wi-Fi (like at a cafe or airport), disabling your VPN is a much bigger risk, as your data becomes visible to anyone else on that network and is susceptible to getting intercepted.
Why does my VPN keep turning itself back on?
This is usually caused by Connect on Demand (iOS) or Always On VPN (Android) being enabled in your phone's system settings. Even if you turn the app off, your phone’s operating system sees the lack of a tunnel as an error and helpfully reconnects you to keep you protected.
What's the difference between disabling and uninstalling a VPN?
Disabling simply stops the current connection but leaves the app and its settings on your device for later use. Uninstalling wipes the software and its network configurations entirely, meaning you’ll have to download and log in all over again if you want to use it in the future.
Will disabling my VPN cancel my subscription?
No. Turning off the app, or even deleting it, doesn’t stop the billing cycle for your account. You must manually cancel your subscription through the VPN provider’s website or your device's App Store/Google Play settings to stop future charges.
How do I disable a VPN that I didn't install (work/school)?
If the VPN was installed via a Mobile Device Management (MDM) profile, the toggle is likely grayed out and locked. You generally cannot disable these without IT admin intervention, as they are policy-enforced for security.
Can I disable a VPN for specific apps only?
Yes, using a feature called Split Tunneling. This allows you to choose which apps (like your bank or a local game) bypass the VPN while the rest of your device’s traffic stays encrypted.
Does disabling a VPN delete its configuration?
No, disabling just turns off the tunnel. Your server preferences, login credentials, and network rules remain saved in the app or system settings until you manually forget or remove the profile.
How do I block all VPNs on my home network?
You can block many VPNs by disabling common VPN ports (like UDP 500 or 4500) and protocols in your router’s firewall settings. However, sophisticated VPNs can bypass this by masquerading as regular web traffic, making total blocking very difficult for a standard home router.
Why is my internet not working after I disabled my VPN?
Your VPN’s Kill Switch is likely still active, blocking all traffic because it thinks the unprotected connection is a security leak. Re-open your VPN app and disable the Kill Switch or Network Lock feature to restore your internet access.
How do I know if I have a VPN running at all?
Check your status bar for a VPN badge (iOS), a key icon (Android), or a shield icon (Windows/macOS). For a 100% certain check, visit Windscribe’s free IP checker. If the location shown doesn't match your actual city, a VPN is active.


