


Running a VPN at the router level routes and encrypts internet traffic for every device assigned to the VPN profile, including devices like smart TVs, game consoles, and IoT gear that may not support VPN apps individually. This guide covers how to configure Windscribe on an ASUS router running the stock ASUSWRT firmware using the OpenVPN protocol.
Applies to: ASUS routers running ASUSWRT firmware (common compatible models include the RT-AX88U, RT-AX86U, RT-AC68U, and RT-AC3200). Interface details may differ slightly between firmware versions. Routers running firmware version 3.0.0.4.388.xxxxx or later use VPN Fusion instead of the legacy VPN Client interface. Both paths are covered below.
Note on app features: Manual configs do not include app-only features like Firewall protection, Split Tunneling, and access to all Windscribe app protocols. If the VPN tunnel on the router drops, connected devices will not have the same fallback protection provided by the Windscribe app Firewall. Keep this in mind if uninterrupted protection is a requirement.
Confirm you have the following before proceeding:
Check firmware support: Not all ASUS routers or firmware versions expose a VPN client interface. If the VPN menu is absent, update your router firmware via Administration > Firmware Upgrade before continuing.
Both the config file and the VPN credentials are generated from the same place. Log in to your Windscribe account and open the OpenVPN Config Generator, available under your account settings for Pro and Build-A-Plan subscribers. Once there:
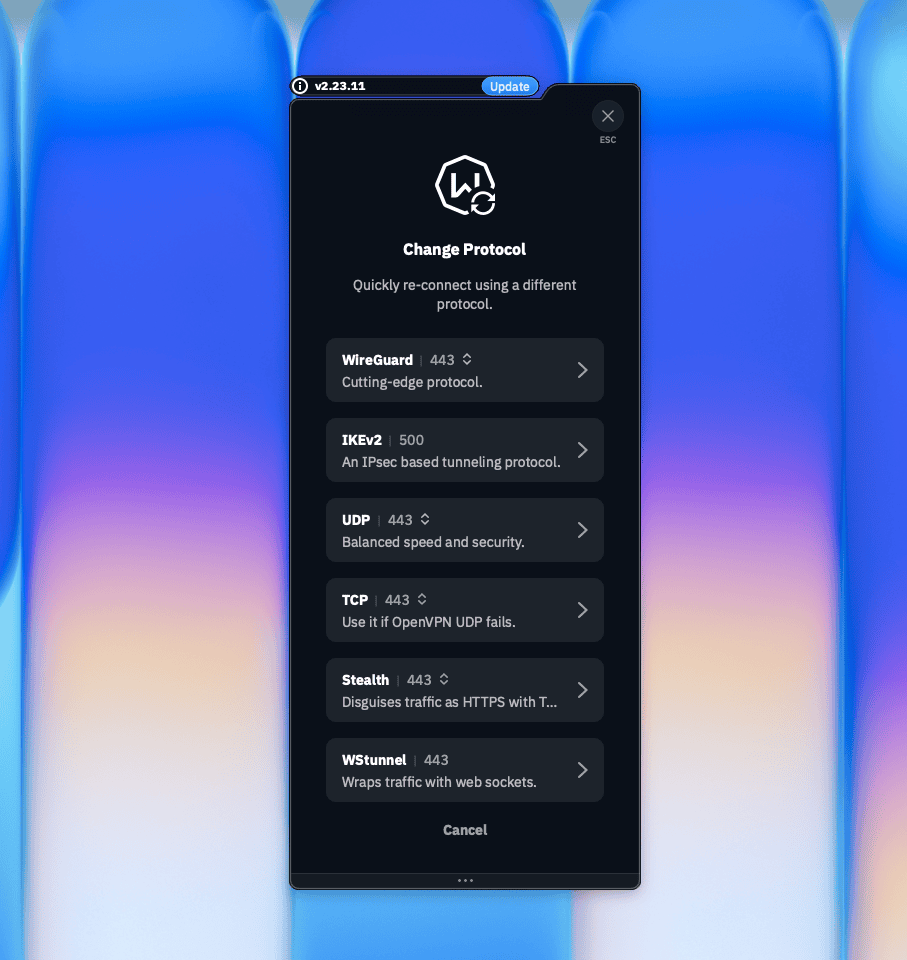
Protocol reference: In the Windscribe desktop app's Change Protocol menu, OpenVPN UDP is labeled UDP. The screenshot shows the available option; it is not selected. Screenshot: Windscribe.
Note: Each .ovpn file is tied to one server location. To use multiple locations, repeat this step for each and save a separate config file per location.
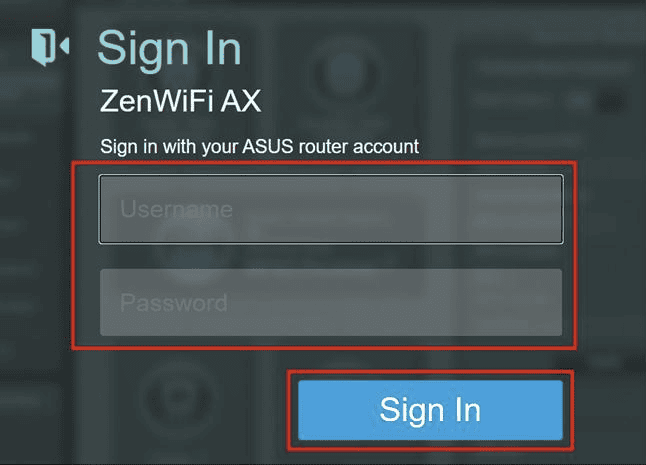
Figure 1: The ASUSWRT login screen. Enter the router admin username and password you set during initial setup. Screenshot: ASUS.
Click VPN in the left Advanced Settings menu. What appears determines which path to follow:
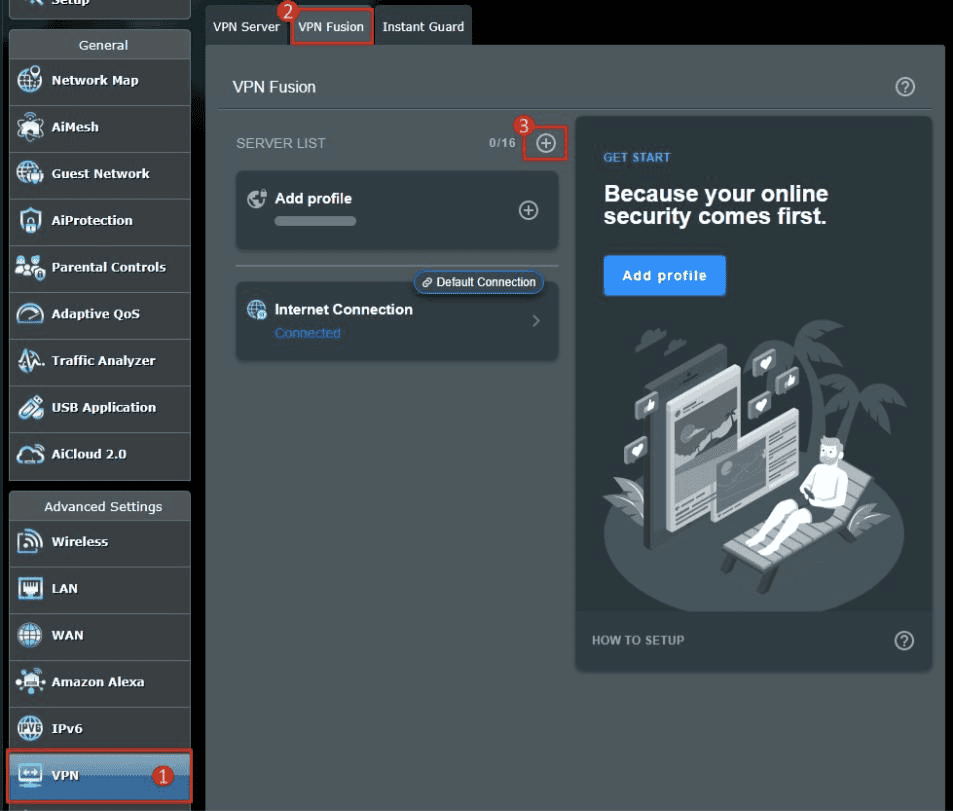
Figure 2: The VPN menu under Advanced Settings. The tab shown here — VPN Fusion or VPN Client — determines whether you follow Path A or Path B. Screenshot: ASUS.
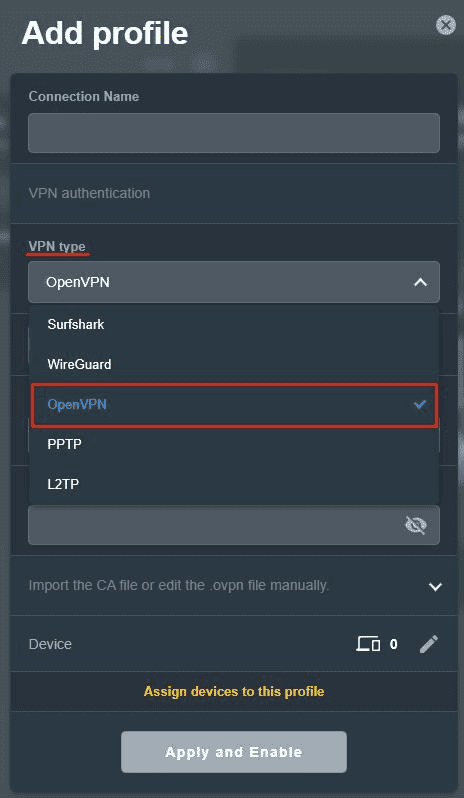
Figure 3: Selecting OpenVPN as the VPN type when creating a new VPN Fusion profile. Do not select PPTP or L2TP. Screenshot: ASUS.
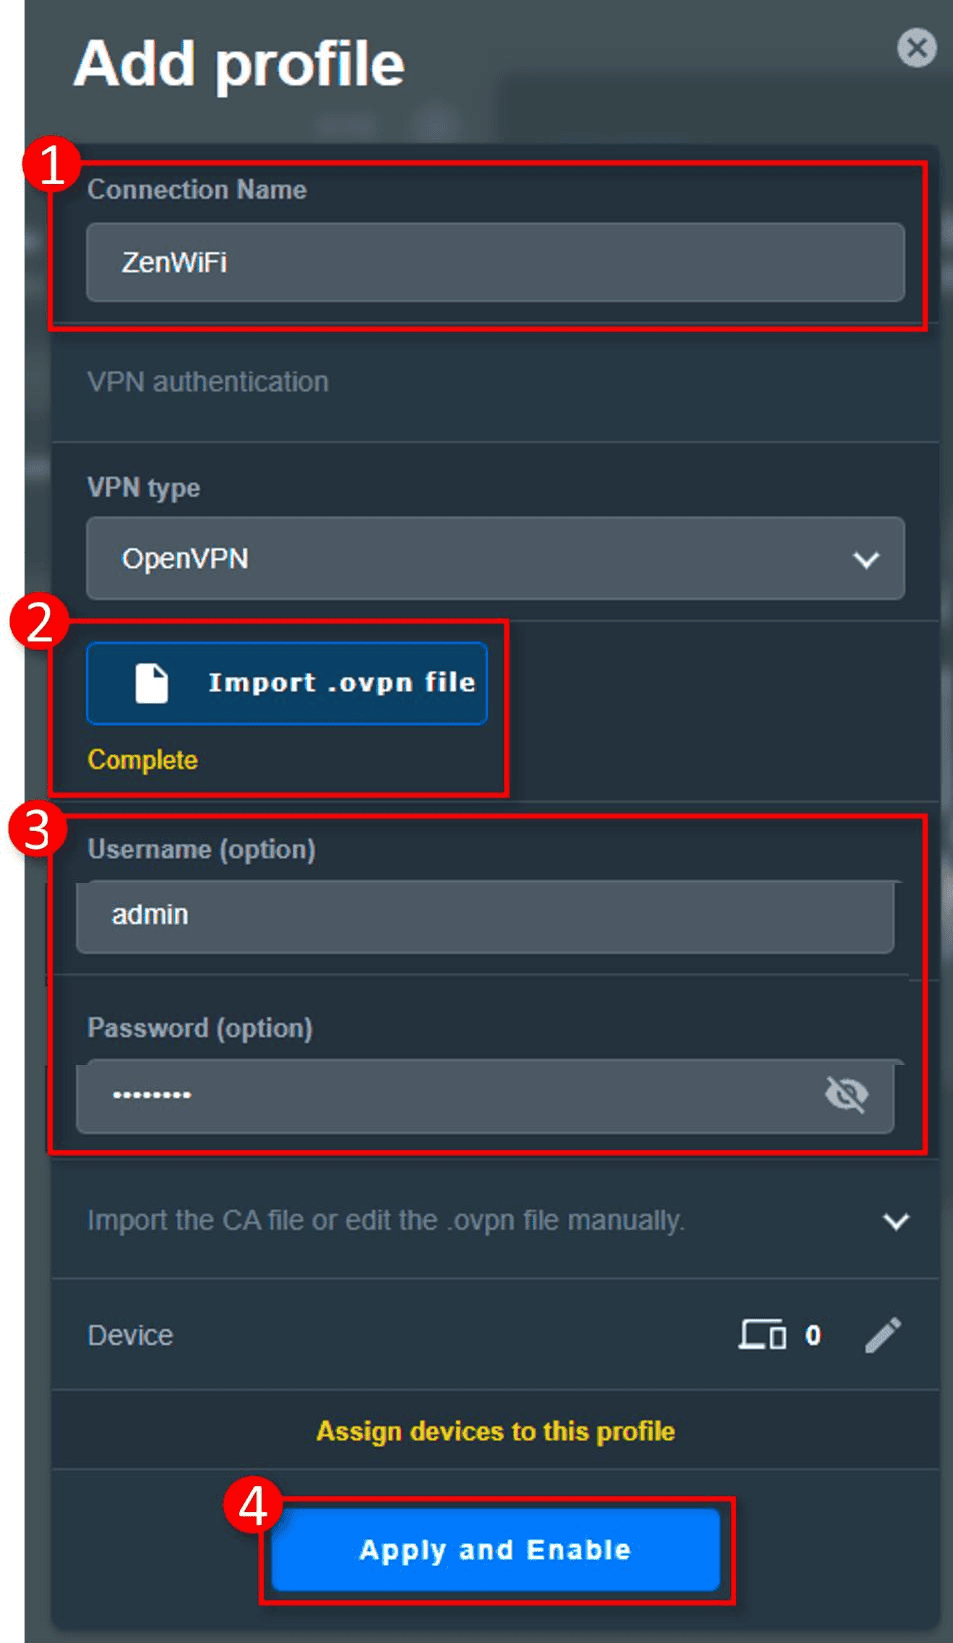
Figure 4: The VPN Fusion profile form: connection name, the imported .ovpn file showing “Complete”, the VPN username and password, and Apply and Enable. The visible admin username is part of the ASUS example; enter the Windscribe VPN credentials generated in Step 1. Screenshot: ASUS.
If Connected is displayed next to the profile, the VPN tunnel is active.
By default, VPN Fusion may not route all devices through the VPN. To apply the VPN connection to all devices on your network, open the profile settings and confirm that Apply to all devices is turned on. If you want to route only specific devices through Windscribe, turn Apply to all devices off and select individual devices using the Edit Device option.
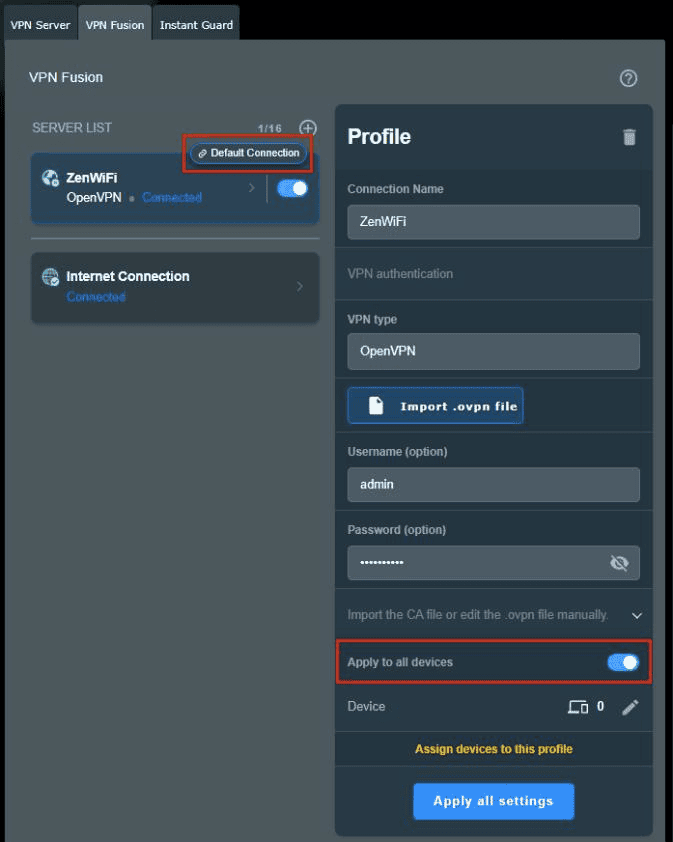
Figure 5: A connected VPN Fusion profile, with the Apply to all devices toggle that controls which devices are routed through the tunnel. The visible admin username is part of the ASUS example; use your generated Windscribe VPN credentials. Screenshot: ASUS.
If VPN Fusion imports the profile but DNS or routing does not behave correctly, use the legacy VPN Client interface if your firmware exposes it, or contact Windscribe support with your ASUS model and firmware version.
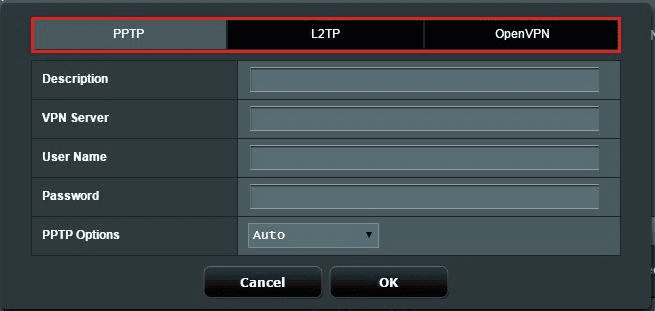
Figure 6: The legacy VPN Client profile dialog showing the available protocol tabs. This ASUS example has PPTP selected; for Windscribe, select the OpenVPN tab and do not use PPTP or L2TP. Screenshot: ASUS.
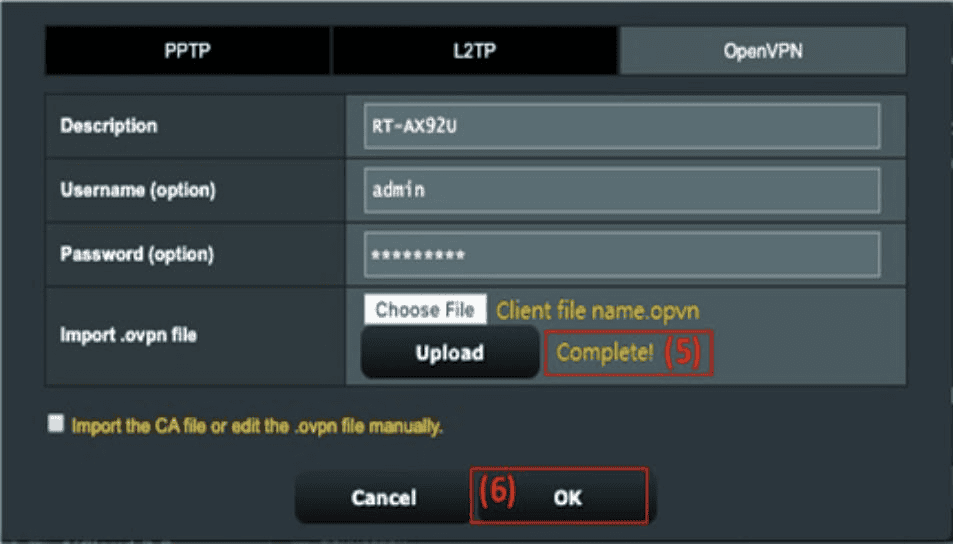
Figure 7: The OpenVPN profile filled in. Wait for the “Complete!” confirmation after Upload before clicking OK. Screenshot: ASUS.
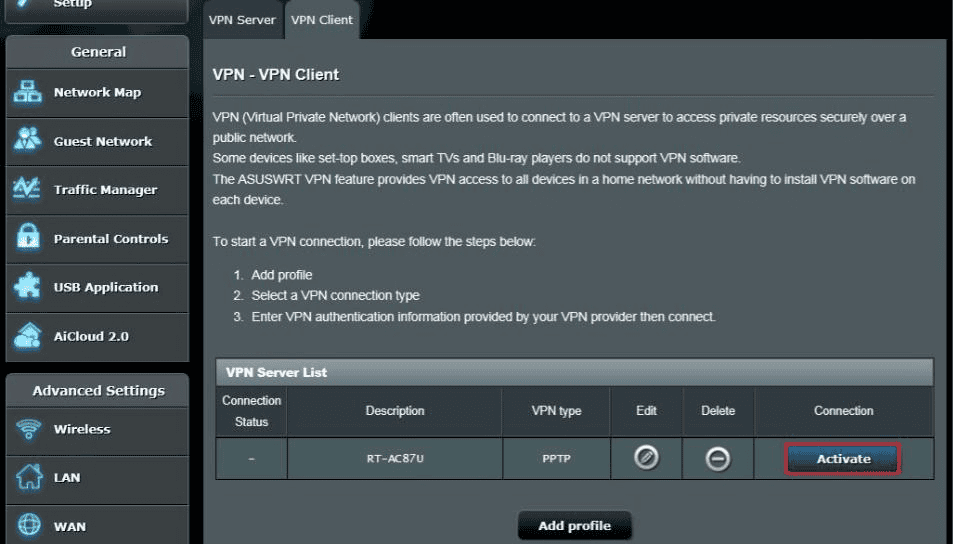
Figure 8: The legacy VPN Client profile list. This ASUS example shows a PPTP profile; for Windscribe, activate the OpenVPN profile you created above. Screenshot: ASUS.
Note: The legacy VPN Client interface supports only one active VPN profile at a time. Activating a new profile automatically deactivates any currently active one.
To verify DNS is also routing through the tunnel, run a DNS leak test at a site such as ipleak.net or dnsleaktest.com. The DNS server results should align with your VPN server location, not your ISP or home location. If they do not, see the troubleshooting section below.
If a leak test reports a DNS server that does not exactly match your assigned VPN IP, that does not automatically mean there is a leak. Windscribe DNS servers often use internal 10.255.255.x addresses or region-specific resolver IPs that will not match your exit IP. To verify directly, run:
nslookup windscribe.com
If the Server or Address line in the output starts with 10.255.255., DNS is routing through Windscribe correctly.
To add additional Windscribe server locations:
Profiles remain saved until manually deleted, so each config file only needs to be imported once.
On some ASUS models and firmware versions, automatic reconnection can be unreliable: the router may not reconnect if the VPN server goes down. Return to the VPN settings in the admin panel and reactivate the profile manually.
If a DNS leak test shows your ISP or home location rather than your VPN server location, DNS queries may not be routing through the Windscribe tunnel. The .ovpn config file includes DNS push settings intended to handle this automatically, but some router DNS or DHCP configurations can override them. Check your router's WAN > DNS settings and LAN > DHCP settings for any hardcoded DNS entries. Removing those overrides allows the VPN config to manage DNS routing. If the issue persists, contact Windscribe support with your router model and current firmware version.
VPN Fusion (firmware 388+):
Legacy VPN Client (pre-388 firmware):
Devices assigned to the VPN profile will resume using your regular ISP connection immediately after deactivation.
Yes. The OpenVPN Config Generator in your Windscribe account requires a Pro or Build-A-Plan subscription. If you are on a Build-A-Plan, you can only generate configs for the locations you have purchased. Pro accounts can generate configs for all available locations.
It depends on which firmware path your router uses. On the legacy VPN Client interface (pre-388 firmware), the active VPN tunnel is generally used for router traffic by default once a profile is activated. On VPN Fusion (firmware 388 and later), you must open the profile settings and confirm that Apply to all devices is turned on. If that setting is off, only devices explicitly assigned to the profile will use the VPN.
WireGuard is supported on ASUS routers running firmware 3.0.0.4.388.xxxxx or later via VPN Fusion, but not on every model in that firmware range. Check your model against the ASUS supported device list at asus.click/vpnfusionmodel. If your model supports it, Windscribe provides WireGuard configuration options in your account for supported manual setups. A Pro or Build-A-Plan subscription is required.
Some speed reduction is expected. OpenVPN encryption is processed by the router's CPU, and routers with lower-specification processors will show a more noticeable impact. Choosing a Windscribe server close to your physical location reduces latency. On supported models and firmware, WireGuard is generally faster than OpenVPN due to a lighter cryptographic workload.
Yes. R.O.B.E.R.T. is a server-side DNS filtering tool that applies on Windscribe VPN connections when DNS routes through the tunnel, including router OpenVPN connections. Your R.O.B.E.R.T. settings from your Windscribe account will be active as long as DNS is routing correctly through the tunnel. A DNS leak test as described in Step 6 can confirm that DNS is not going to your ISP, but it does not verify every filtering edge case.
Log in to the router admin panel and go to Administration > Firmware Upgrade. The version number currently installed on your router is displayed at the top of that page. If it reads 3.0.0.4.388.xxxxx or later, your router uses the VPN Fusion interface. If it reads an earlier version, follow Path B in this guide.
Yes. If you have purchased a Static IP add-on through your Windscribe account, your Static IP location should be available in the location dropdown in the OpenVPN Config Generator. Select it, choose AES-CBC under Cipher if shown, download the config, and import it as a new router profile following the same steps in this guide.
A manual router config covers the whole network but does not include the per-device features available in the Windscribe app, such as Firewall protection and Split Tunneling. For devices where you want those features, install the app directly alongside this router setup. Download it for Windows, Mac, Linux, iOS, and Android at windscribe.com/download.
If you need a Pro or Build-A-Plan subscription to complete this setup, plans start at $3 per month at windscribe.com/upgrade.
The following Windscribe guides are directly relevant to router setups: