Synology NAS Setup Guide
Want Windscribe on your Synology NAS? No problem.
Step 1
Get OpenVPN Config file and credentials (requires a pro account).
Step 2
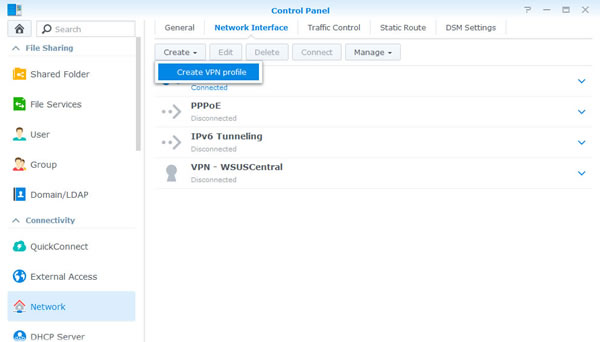
Open the Synology Control Panel, go to the "Network" section and then open the "Network Interface" tab.
Go to Create -> Create VPN profile
Step 3
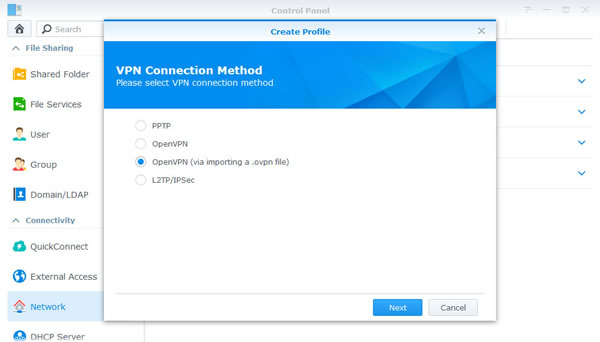
Choose "OpenVPN (via importing a .ovpn file)" option
If this option is not available and you just have "OpenVPN", click here
Step 4
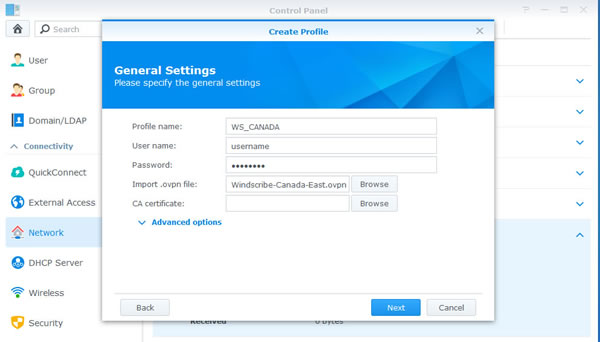
Fill out the fields as follows:
Profile name: Call it whatever you like
Username: Username from Step 1. This will be different from your Windscribe username.
Password: Password from Step 1. This will be different from your Windscribe password.
Import .ovpn file: Config file you downloaded in Step 1
CA certificate: Leave blank
Step 5
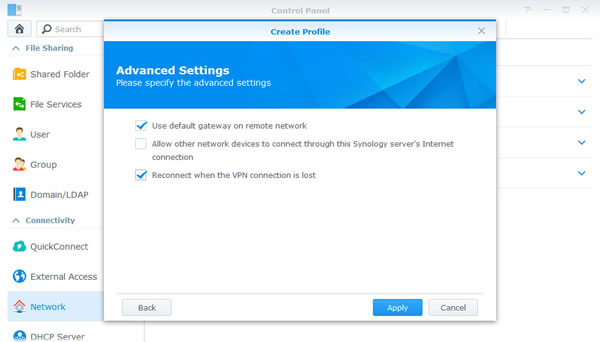
Check mark "Use default gateway on remote network" and "Reconnect when the VPN connection is lost". Click "Apply."
Step 6
Right click the profile you just created and select "Connect".
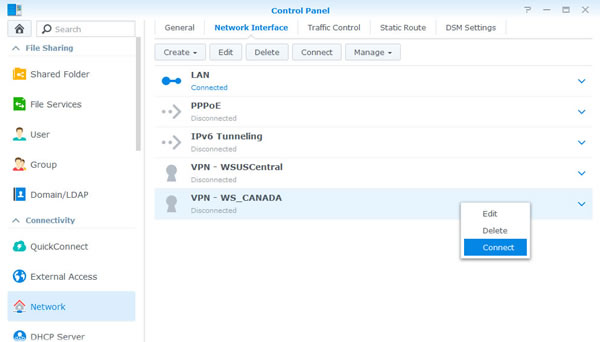
Step 7
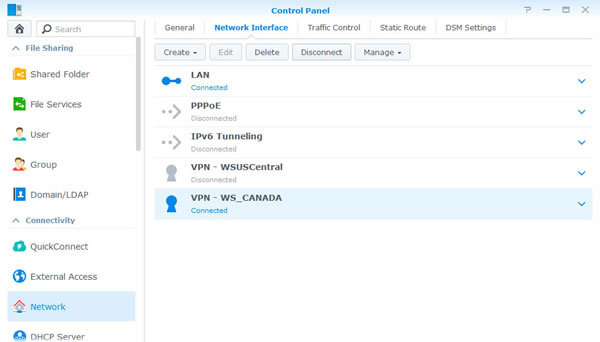
It should say "Connected" if the connection was successful.
Legacy Config
Step 1
Get OpenVPN Config file and credentials (requires a pro account). You will also need the CA Cert and TLS Auth Key.
Step 2
Open the Synology Control Panel, go to the "Network section" and then open the "Network Interface" tab.
Go to Create -> Create VPN profile

Step 3
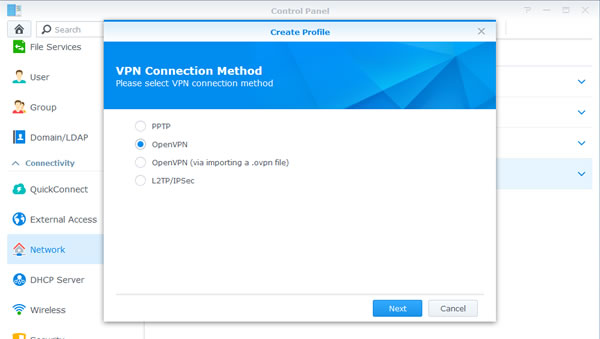
Choose "OpenVPN" option
Step 4
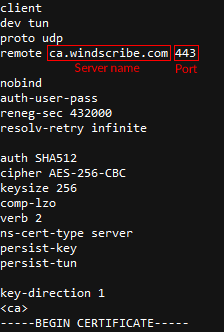
Open the .ovpn config file you downloaded in Step 1 with a text editor and find the line that says "remote". You will see xx.windscribe.com, xx = country of your choice. This will be the the "Server address". The number that follows is the "Port".
Step 5
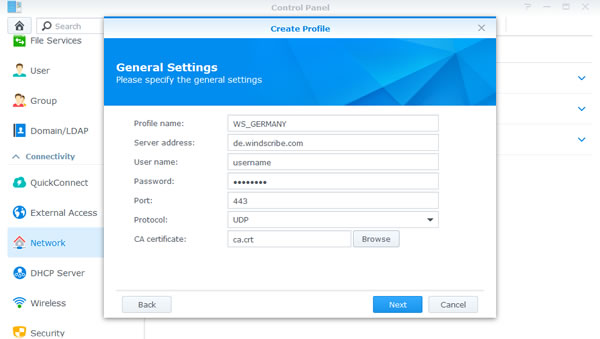
Fill out the fields as follows:
Profile name: Call it whatever you like
Server address: Hostname from Step 4
Username: Username from Step 1. This will be different from your Windscribe username.
Password: Password from Step 1. This will be different from your Windscribe password.
Port: Port from Step 4. Make it 443 if you are unsure.
Protocol: Depends on your selection in Step 1. This could be UDP or TCP. Leave as UDP if you are unsure.
CA certificate: ca.crt which you downloaded in Step 1
Step 6
Check mark "Use default gateway on remote network" and "Reconnect when the VPN connection is lost". Click "Apply."
Step 7
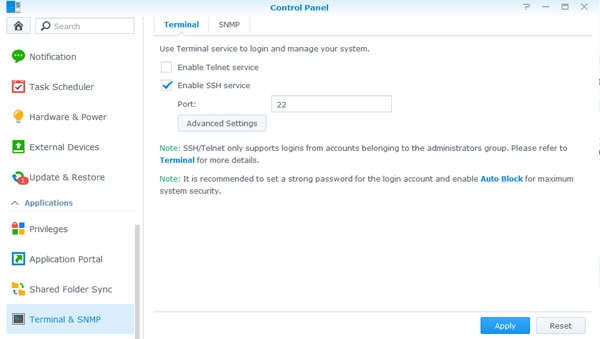
Go to the "Terminal & SNMP" section of the Control Panel (its at the very bottom). Check mark "Enable SSH Service" and click Apply.
Step 8
If you're using Windows, you will need to download an SSH client. If you are using MacOS or Linux, just open Terminal.
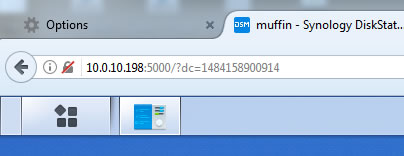
Copy the IP address of your Synology NAS from the address bar. In this example, we are using 10.0.10.198 but yours will be different.
Step 9
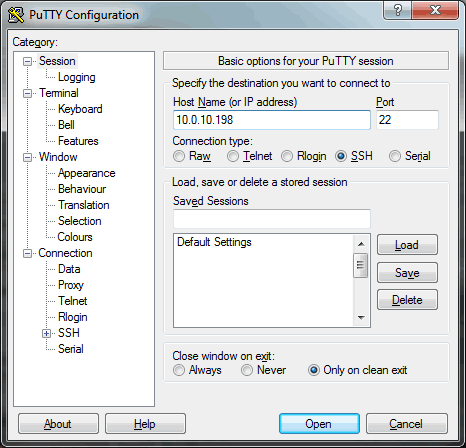
Open Putty (you downloaded it in Step 8) and input the IP address into the "Host name" box. If you're using MacOS or Linux, just enter this command instead (make sure to use your actual IP):
ssh 10.0.10.198
Step 10
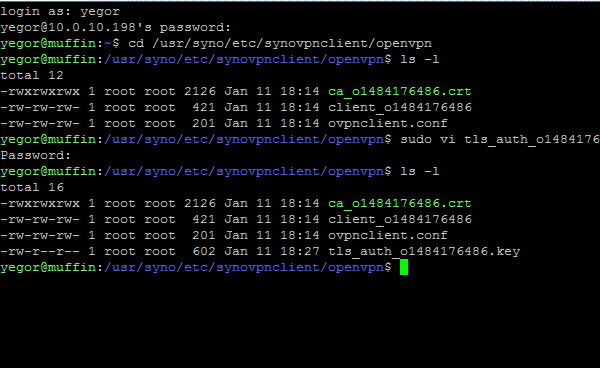
Enter your Synology NAS username and password when prompted. If successful, you should see something like the image below. My username is "yegor" and the hostname of the NAS is "muffin" but yours will be different (but I strongly recommend calling your NAS a muffin, because muffins are awesome.)

Step 11
Enter the following command:
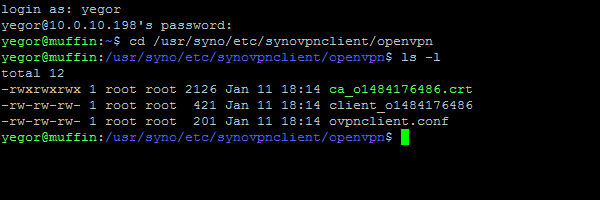
cd /usr/syno/etc/synovpnclient/openvpn
Then enter this command:
ls -l
You should see 3 files, similar to the ones below, but the numbers after "ca_" and "client_" will be different.
Step 12
Enter the following command, be sure to change the bold part to what you have on your NAS after "client_":
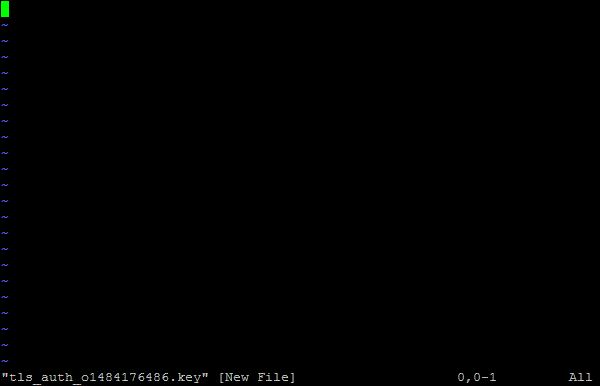
sudo vi tls_auth_o1484176486.key
It will ask you for your Synology admin password. If password is not requested and you get an error, remove "sudo" from the command.
You should see something like this:
Step 13
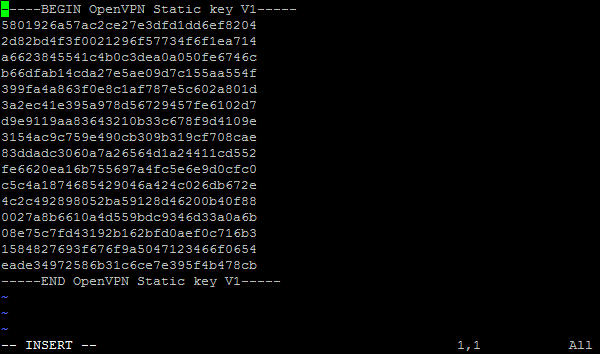
Press the letter "i" on the keyboard. It should say "-- INSERT ---" at the bottom left of the screen. Paste contents of ta.key from the .zip you downloaded in Step 1. You should open it via a text editor. Standard paste shortcut won't work, right click the mouse to paste the text.
You should see something like this:
Step 14
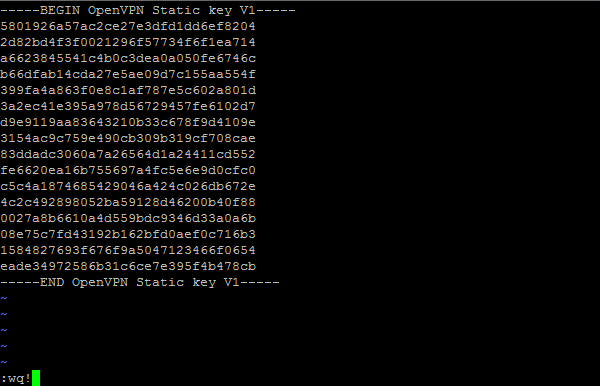
Now press Escape key, it should take you out of "-- INSERT --" mode. Then type this:
:wq!
And press Enter. You should now be back to command prompt.
Step 15
Enter this command:
ls -l
You should now see 4 files, including the one you just created.
Step 16
Now we need to edit the main config file and add a few extra parameters. Enter the following command, be sure to change the bold to part to what you have on your NAS after "client_":
sudo vi client_o1484176486
You should see something like this:
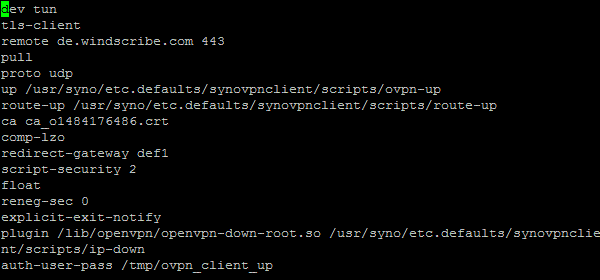
If you get an error, remove "sudo" from the start of the command, same as before.
Step 17
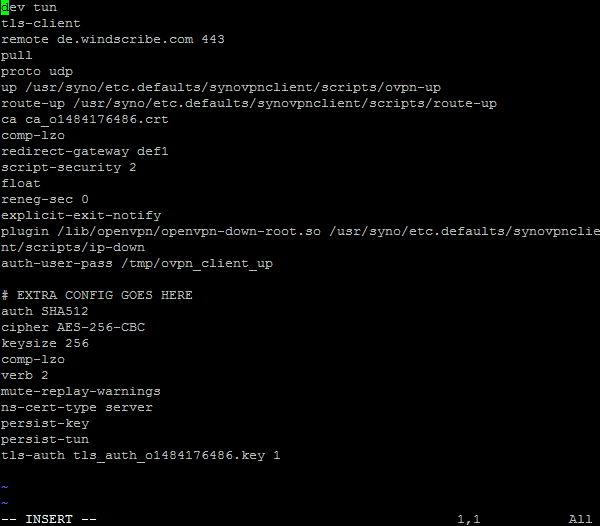
Press the letter "i" on the keyboard. It should say "-- INSERT ---" at the bottom left of the screen. Paste the following into the bottom of the file. Keep in mind "tls_auth_o1484176486.key" will be called differently on your NAS, so adjust it accordingly. Standard paste shortcut won't work, right click the mouse to paste the text.
# EXTRA CONFIG GOES HERE
auth SHA512
cipher AES-256-GCM
verb 2
mute-replay-warnings
remote-cert-tls server
persist-key
persist-tun
tls-auth tls_auth_o1484176486.key 1
You should seem something like this. Make sure the "1" after tls_auth_o1484176486.key is there.
Step 18
Now press Escape key, it should take you out of "-- INSERT --" mode. Then type this:
:wq!
And press Enter. You are done!
Step 19
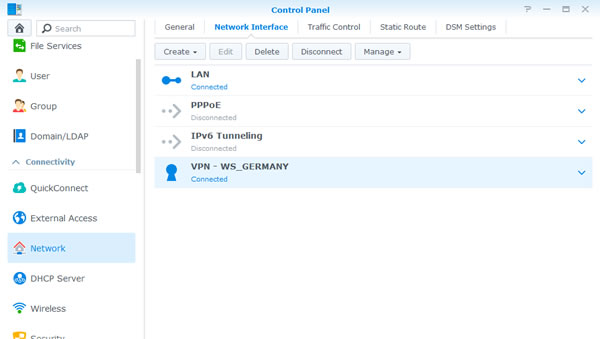
Now go back to the Synology Control Panel, "Network" section, "Network Interfaces" tab, right click the profile you just created and select "Connect". If you followed the steps, it should say "Connected" below the profile after a few seconds.
Step 20
Have a muffin.
Synology DS115j VPN Tutorial | Synology DS216se VPN Tutorial | Synology DS416slim VPN Tutorial | Synology RS217 VPN Tutorial | Synology RS816 VPN Tutorial | Synology DS416play VPN Tutorial | Synology DS416 VPN Tutorial | Synology DS216play VPN Tutorial | Synology DS216 VPN Tutorial | Synology DS116 VPN Tutorial | Synology DS1515 VPN Tutorial | Synology RS2416+ VPN Tutorial | Synology RS815+ VPN Tutorial | Synology DS916+ VPN Tutorial | Synology DS716+II VPN Tutorial | Synology DS216+II VPN Tutorial | Synology DS2415+ VPN Tutorial | Synology DS1815+ VPN Tutorial | Synology DS1515+ VPN Tutorial | Synology FS3017 VPN Tutorial | Synology RS3617xs+ VPN Tutorial | Synology RS3617RPxs VPN Tutorial | Synology RS3617xs VPN Tutorial | Synology RS18016xs+ VPN Tutorial | Synology RC18015xs+ VPN Tutorial | Synology DS3617xs VPN Tutorial