Ubuntu Setup Guide
So you ditched Windows for Linux? Great, here is how you setup Windscribe on it.
Use Our App
Check out our native Linux app.
Manual Setup
Step 1
Get OpenVPN Config file and credentials (requires a pro account). You will also need the CA Cert and TLS Auth Key.
Step 2
Run the following commands in Terminal:
sudo apt-get install network-manager-vpnc
sudo apt-get install openvpn network-manager-openvpn network-manager-openvpn-gnome
sudo /etc/init.d/networking restart
To run OpenVPN via command line, use the command below, otherwise continue:
sudo openvpn --config /path/to/downloaded/config.ovpn
Step 3
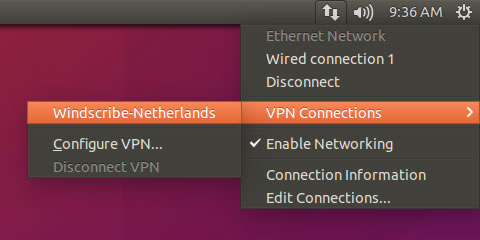
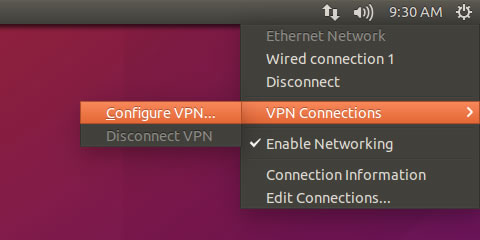
Go to the top network menu -> VPN Connections - > Configure VPN
Step 4
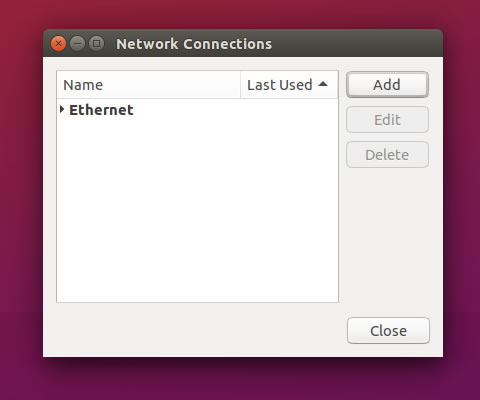
Click "Add"
Step 5
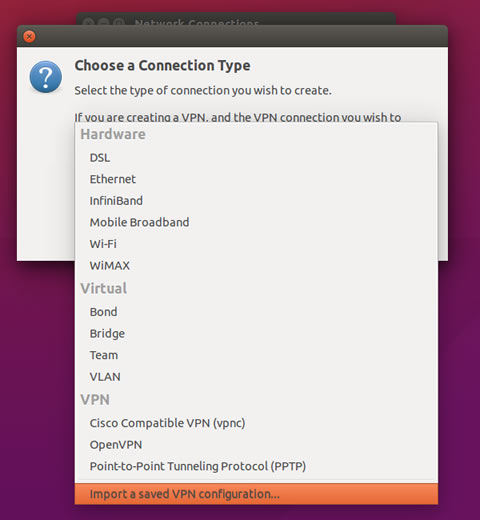
From the dropdown menu, choose "Import a saved VPN configuration"
Step 6
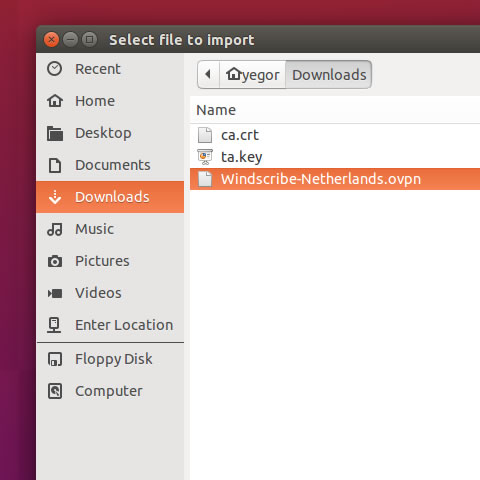
Select the .ovpn config file you downloaded in Step 1
Step 7
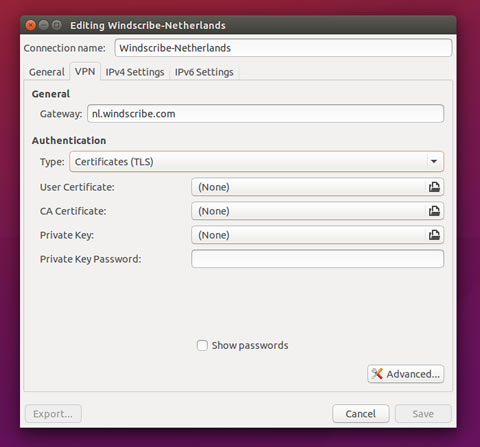
Your screen should now look like this.
Step 8
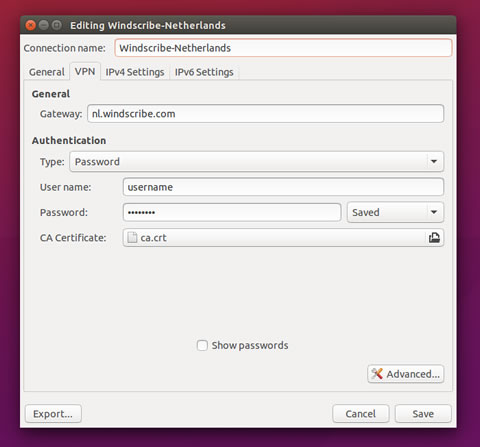
Change "Authentication Type" to "Password"
Enter your username and password from Step 1. This username and password will NOT be the same as your Windscribe login.
If you are using Ubuntu 16.04, skip to Step 11, otherwise continue below.
Step 9
Set the "CA Certificate" to ca.crt you downloaded in Step 1
Step 10
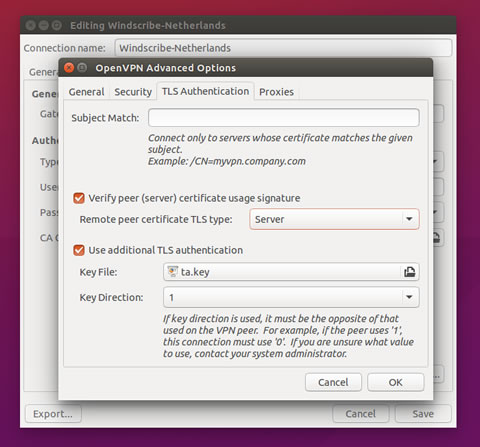
Click "Advanced" and go to "TLS Authentication" tab
Check the "Verify peer (server) certificate usage signature" box and set the drop down menu to "Server".
Check the "Use additional TLS authentication" box and input ta.key you downloaded in Step 1. Key direction should be set to "1".
Hit OK and Save.
Step 11
Go to the top network menu -> VPN Connections and choose the profile you just created.
